
Create Your First Badge
Learn how to create a custom badge from scratch. It takes just a few minutes.
Before You Start
Make sure you're logged in to Badge Box.
Creating a Badge
1
Go to Creator
Click Creator in the navigation menu.
2
Click New Badge
Select Create New Badge to start fresh.
3
Fill in Details
Enter the badge information (see below).
4
Create Badge
Click Create. Approve signing if using an extension.
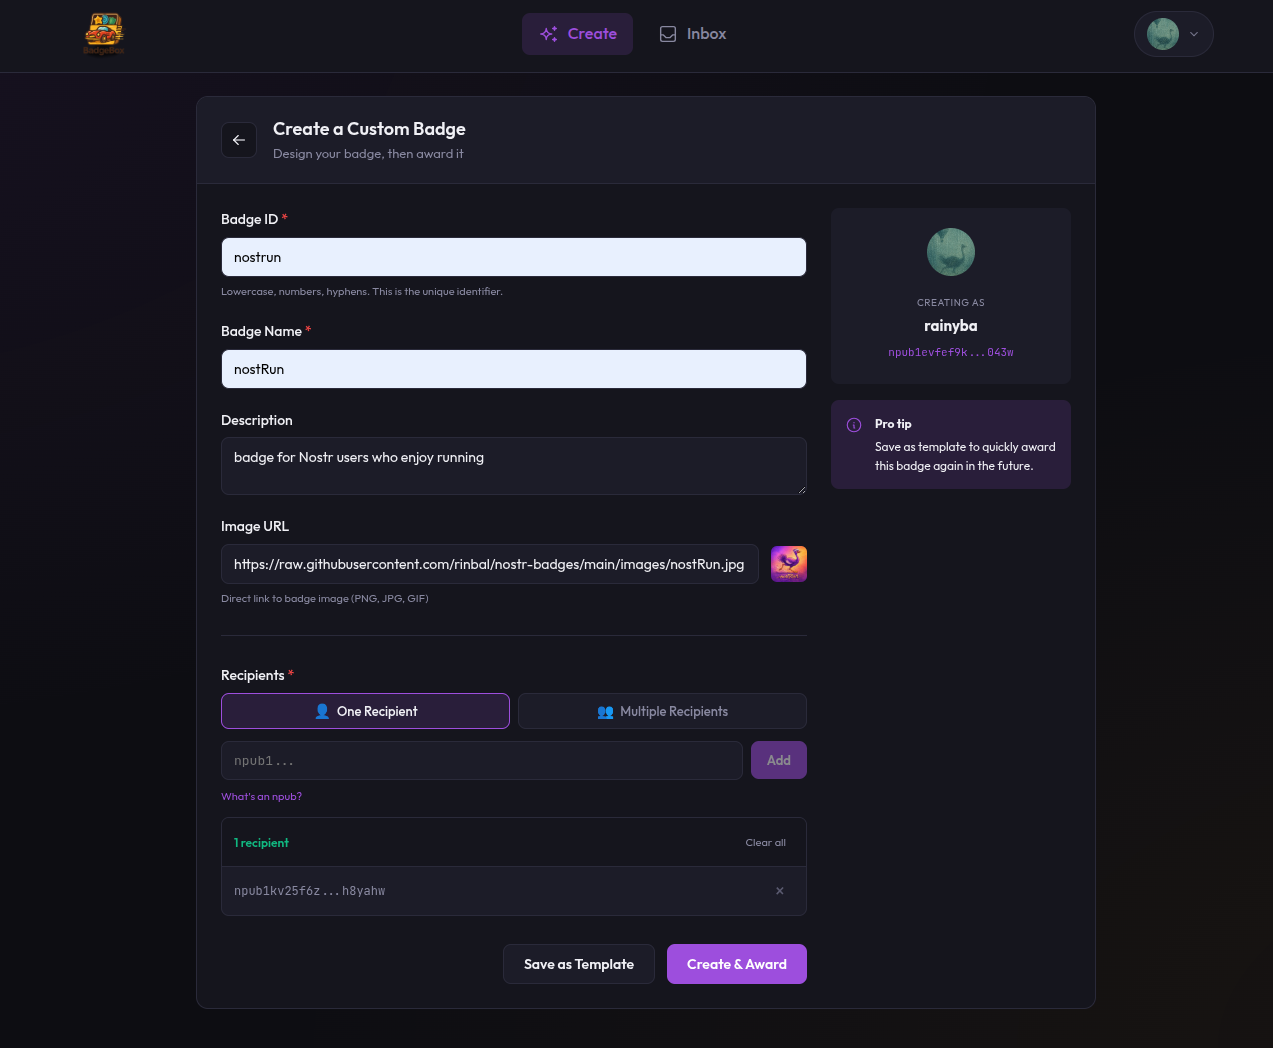
Creating a custom badge in Badge Box
Badge Details
| Field | What to Enter | Example |
|---|---|---|
| Identifier | Unique lowercase ID (letters, numbers, hyphens) | community-helper |
| Name | Display name | Community Helper |
| Description | What the badge means | Awarded to helpful community members |
| Image URL | Link to badge image | https://example.com/badge.png |
Image Tips
Use a square image for best results. Host it somewhere reliable — GitHub, Imgur, or your own server. The image URL must be publicly accessible.
What Happens Next
When you create a badge:
- Badge Box builds a Nostr event (kind 30009)
- You sign it with your key
- It's published to multiple relays
- Anyone can now verify this badge exists
The badge is now ready to award.
Save as Template
Want to use this badge design again? Click Save as Template after creating. It appears in your templates list for quick access later.